Thursday, October 28, 2010

Da Capo

I've been perusing some old journals lately and came across a quote by W.M. Thackeray I had written down several years ago.  I like it. :)

"There may be nothing new under (and including) the sun; but it looks fresh every morning, and we rise with it to toil, hope, scheme, laugh, struggle, love, suffer, until the night comes and quiet.  And then we will wake Morrow and the eyes that look on it; and so 'da capo'." 

~W.M. Thackeray, The Newcomes

Have a lovely day!
~Bessie

Friday, October 15, 2010

The Man Shirt

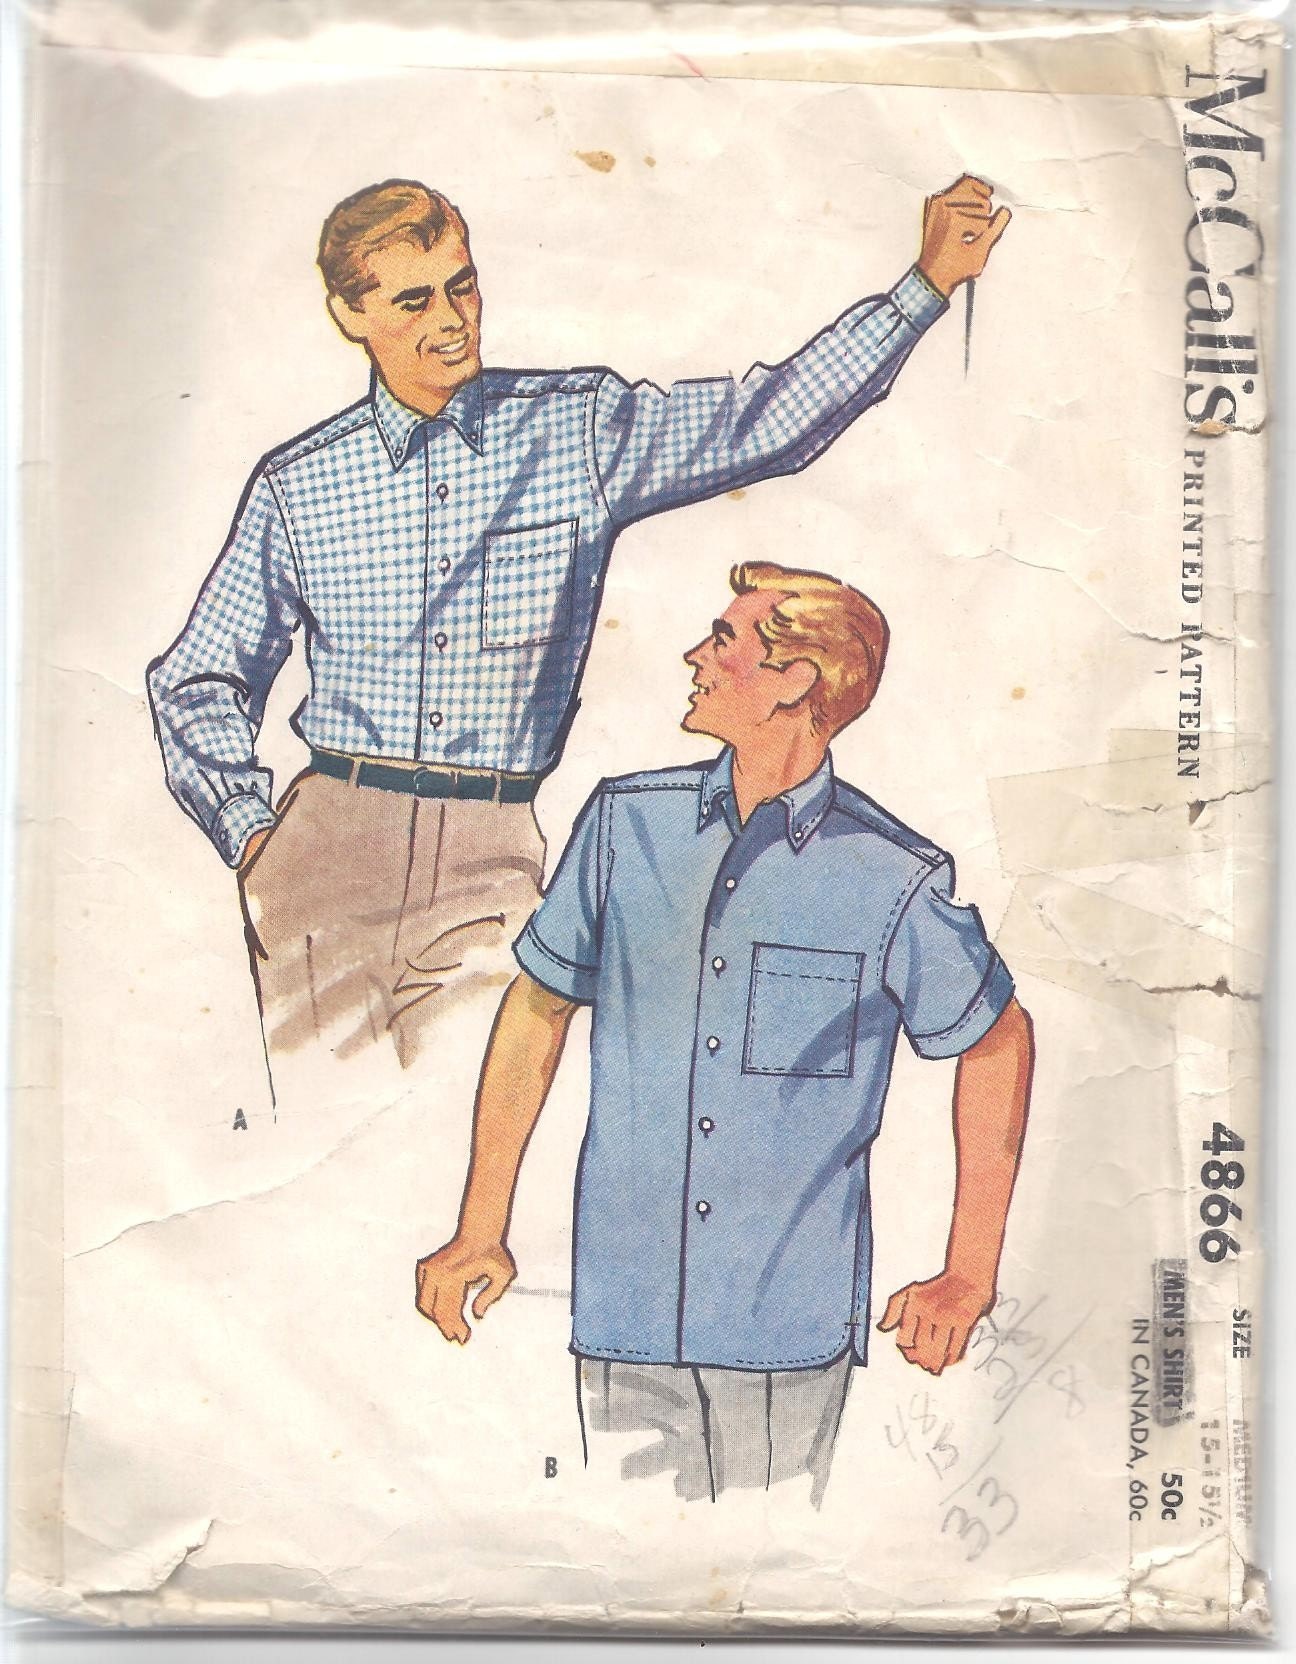
My First Man Shirt

Pattern Used:
VTG 1954 - MCCALLS 4866 - MENS CASUAL SHIRT - SZ 15 - CUT.COMPLETE


The fabric I used was a nice, thick, soft flannel plaid.  It washed really well, and is super warm!  Here are pics of the front and back:


 The buttonholes (which I realize you cannot see here) are hand-worked, and the buttons are vintage.


I made a tag for the inside.  I've always wanted to do this, but keep forgetting until it is too late in the construction stage to add it!  For this one I embroidered a bit of linen, edged it with some brown piping, and sewed it onto the yoke facing before stitching everything together.


The cuff buttons might just be my favorite thing about this man-shirt.  They are antique copper buttons, with a touch of oxidation here and there.  I found a whole bunch of these in my huge jar of estate sale buttons.  Doesn't the copper contrast nicely with the blues in the plaid?


As per the pattern instructions, I used flat-felled seams for the sides and underarms of the shirt.  I think they turned out nicely!  This was the first time that I had tried flat-felled seams--I usually do French seams on blouses (which can be over-doing things a bit, depending on the fabric, but I like the way they look).

So there you have it!  I really enjoyed this sewing project, partly because it was fun sewing something boxy and plaid (I think working with plaids is the bomb), and partly because I was making it for someone that I care about.   

Have a fantastic Saturday--and pray for me...math finals this weekend!
~Bessie


Just because

1. He's so darn cute 

2. I feel blessed today.  Well, I am blessed. :)

3. Bessie

Monday, October 11, 2010

Music in Marietta

Davis and I went to the Marietta square and played music yesterday with some of our friends.  It was super fun!  My sister Skylar took some great pictures; I'll share one with you here, as I am wearing one of my favorite vintage creations.  More pics should be up on our band page soon!


 <><><><><>

In other news, I've been working on the bodice of Jenny's dress, and it is coming along nicely!  Sorry about the funky coloration in these photos:


 Hopefully I'll be able to finish the bodice and begin work on the skirt this week.  :)

Have a great day!
~Bessie

Saturday, October 9, 2010

The Apple Festival

I am supposed to be doing math homework, but I keep remembering other things I "need" to do and getting distracted.  Like I really needed to post about my trip to the mountains today--like right now.  I also needed to package a few patterns to ship, go through the mail, fiddle around with the camera, and watch a few videos on YouTube.

Yes, I am putting off my homework and I own it.  That's right, I own it.  One more week to go, Bessie.

<><><><><>

SO!  Today my dear friend Stephanie and I went to a humongous apple festival in the mountains.  It was very fun, and there were TONS of people there.  However, there were two problems:

1. It was about 90 degrees outside.  It is supposed to be cold in the mountains in October, so Stephanie and I wore jeans and sneakers.  We should have worn summer dresses or shorts and tank tops.  But it seemed so wrong, neither one of us could bring ourselves to do it.

2.  They didn't have any caramel apples!!!  What?!  Well, I take that back.  They had sliced caramel-covered apples in a bowl (which were tasty, but not the same).  But no apples on a stick!  What is this world coming to, anyway?

So that was a tad disappointing.  However we did get to see a couple camels, and that definitely made up for the disappointment.  Yes, there were camels in the mountains of Georgia today.  Stephanie wanted me to ride one, but I was chicken.

Here are a few pics of our day! :D
 The crazily large crowds

 Wow.  Can you feel the excitement?  Do you feel the urge to push my hair out of my face (I do)?

 Camels!


 We ate some very interesting and slightly questionable food.

So we had a fun time. :D  My favorite part of the day was spending time with Stephanie.  We always have a blast, whatever we end up doing.  I feel blessed to have her in my life!  

"The great need is not to do things, but to believe things.  The Redemption of Christ is not formed an experience, it is the great act of God which he has performed through Christ, and I have to build my faith upon it.  If I construct my faith on my experience, I produce that most unscriptural type, an isolated life, my eyes fixed on my own whiteness."  Oswald Chambers, My Utmost for His Highest. 10/9.

~Bess


Friday, October 8, 2010

Coasters: A Tutorial (because I am obsessed)


I had so much fun re-purposing those old coasters a couple weeks ago, I decided to look online and see if I could find any more.  Much to my surprise, I found a TON!  Apparently these Japanese dead-butterfly coasters were very common back in the day.  The ones I found online were in much better condition than the ones that I found at the barn sale, and actually look quite pretty in their original form.

Anywho, I bought about a dozen more and decided to chronicle the process I used to re-purpose them in case anyone else is interested in doing the same.  :)  Enjoy!


Vintage Coaster Make-over Tutorial--Whoop!

Step 1:  Find coasters.  Try going to Etsy or eBay and typing in "vintage butterfly coaster."  Here are some links to current listings: eBay 1, eBay 2, Etsy 1, Etsy 2.  Some listings are super-expensive, and some are very reasonable.  I hate that the shipping is so high, but I think it's worth it. :D

Step 2: Disassemble coasters.  Unfortunately I got a little too excited about my new coasters and didn't think about taking pictures of the process until after I had disassembled all of them.  Whoops.  It's pretty easy to explain though. :)  All you have to do is gently press on the glass/plastic from the front of the coaster.  This should pop off the wooden ring in the back and enable you to remove the insert.  Once you do this, slide (or peel, if necessary) the old dead butterfly and tissue paper off of the glass.

Step 3: Wash and dry glass and plastic inserts and backing pieces.  

 I like to fill my sink up with hot soapy water and let them soak, as they usually have a little glue residue around the edges (and sometimes in the middle).  A few of the plastic backings here had a lot of residue and discoloration. 

This is a plastic backing piece that has cleaned up very nicely.

This is a plastic backing piece that has NOT cleaned up nicely.  We will put this behind a darker-colored fabric...:p

Step 4: Cut out fabric circles.  Using a back insert piece as your guide, trace circles onto your fabric of choice.  You can use a coaster (empty of glass) as a sort of frame to help you choose aesthetically-pleasing sections of fabric. :D  Here are my circles:
(Some of these photos are w/ flash and some are w/o flash.  This one is with.)

Step 5: Apply Glue. Using an old paintbrush or q-tip (or your fingers, if you like), cover the back insert with  lightly with glue.  Elmer's glue worked great for me.  
Just a very light coating of glue will do.


Step 6: Apply fabric circle to back insert.  Using a bit of pressure, smooth the fabric circle over the glue on the back insert.  After smoothing it with your fingers, you may also wish to turn it over and rub it on your work surface, just to make sure there are no air bubbles.


Step 7: Put it all together.  Turn a coaster upside-down on your work surface.  First insert a glass/plastic piece, then place a fabric-covered back insert on top.  Put a small amount of glue around the edges of a wooden ring piece (the part that fits into the back of the coaster and holds everything together) and press into place on top of the back insert.  Press firmly, but not too hard.


Step 8:  Let it dry.  You may wish to set a glass or mug down on top of your coaster as it dries, just to help it stick better. 


Ta-da!  That's it!  It is such a fun project.  Don't you just love the end result?

Have a fantastic weekend,

Bessie


Wednesday, October 6, 2010

I don't really like animals, but...

I admittedly am not a huge animal-lover, but for some reason I have a soft spot for goats and cats.  Dogs--not so much.  Only if they are outside and do not slobber on me.  Just thought I'd share that with you.

Anyway, I realized that I have not posted about my little goaties in a while.  So here are a few photos!


Dean's coat is coming back in, and it is absolutely gorgeous.  He is also showing the beginnings of a beard!  (My little man's growin' up!) (I feel like I should erase the last parentheses, but I'll leave it up for the sake of honesty.  Yes, I do feel that way about my goat.  Yes, I know this is strange.  I will own this.)


Truitt is adorable and funny, and follows Dean around like a shadow wherever he goes.  He is getting bigger--he and Dean are about the same size now.  Truitt has become extremely friendly since I got him, and likes to talk a lot.  He has the funniest voice, too--where Dean's is low and scraggly, Truitt's is shrill and loud.

Goat update: complete. On to the funny cat pictures.

Our cat Gracious thinks that she is a person, and thus should be inside the house with the rest of the people.  Sometimes she takes drastic measures in order to accomplish this.

 This is our front door, in case you were wondering.
Meow?

Ok, off to study polling and voting statistics.  Whoop!

~Bessie


"Let us know, let us pursue the knowledge of the LORD.
His going forth is established as the morning;
He will come to us like the rain, 
Like the latter and former rain to the earth."
Hosea 6:3